Feeling a chill in your home even with the heater cranked up? Your windows might be the culprits letting that cold air sneak in. Insulating your windows is a simple DIY project that can make a huge difference in your home’s coziness and your energy bills.
Benefits of Insulating Your Windows
Insulating your windows transforms your home’s comfort and savings. Let’s dive into specific benefits.
Energy Efficiency and Cost Savings
Lowering your energy bills starts with better-insulated windows. By reducing heat loss, insulation minimizes the home’s reliance on heating and cooling systems. The Department of Energy confirms that insulated windows can lead to a 25% reduction in energy bills. Additionally, insulated windows help maintain a stable indoor temperature, enhancing overall efficiency.

Comfort and Noise Reduction
Enhanced window insulation blocks outdoor noises. This creates a quieter indoor environment, perfect for relaxation or work. Insulation also ensures a more consistent temperature, eliminating drafts and cold spots. This constant comfort improves your daily living experience throughout the year, no matter the weather outside.
Types of Window Insulation for DIY Projects
Choosing the right window insulation makes a big difference. Here are effective options.
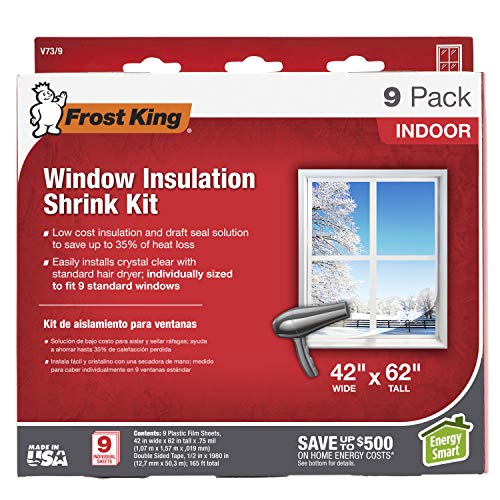
Window Insulation Film
Window insulation film is easy to apply and remove. This clear plastic shrink film attaches to the window frame using double-sided tape. Heat the film with a hairdryer to create a tight seal, reducing drafts and improving energy efficiency.
Weatherstripping
Weatherstripping seals gaps around windows. It’s available in adhesive foam tape, felt strips, or rubber. Apply weatherstripping to window sashes, ensuring a snug fit that blocks drafts and prevents heat loss.
Draft Snakes and Insulating Curtains
Draft snakes are fabric tubes placed at the window base to block cold air. They’re simple to use and effective. Insulating curtains feature thermal liners that help keep heat inside. These curtains are easy to hang and provide an additional layer of insulation.
Step-by-Step Guide to Insulating Your Windows
Insulating your windows enhances energy efficiency and comfort. Here’s how you do it.


Preparing Your Windows
- Clean: Remove dust, dirt, and debris from the window frames using a damp cloth.
- Inspect: Check for cracks, gaps, and old insulation materials. Patch any damage with caulk or sealant.
- Measure: Get accurate measurements of your window dimensions to ensure a precise fit for insulation materials.
- Window Insulation Film:
- Cut: Trim the film to the window size.
- Apply: Attach the film to the window frame using double-sided tape.
- Shrink: Use a hairdryer to shrink the film tightly to the window, ensuring no wrinkles.
- Weatherstripping:
- Choose: Select adhesive-backed or V-strip weatherstripping.
- Install: Peel off the backing and press the weatherstripping firmly along the window edges.
- Draft Snakes:
- Create: Sew or purchase draft snakes.
- Place: Position the draft snake along the bottom window edge to block drafts.
- Insulating Curtains:
- Select: Choose thermal-lined curtains for maximum insulation.
- Hang: Install a curtain rod above the window and hang the insulating curtains, ensuring they overlap the window edges.
These steps guarantee improved insulation, energy efficiency, and a more comfortable living environment.
Tools and Materials Needed for DIY Window Insulation
Insulating your windows improves energy efficiency and comfort. Gather these tools and materials before starting your project.
List of Essential Tools
- Utility Knife: For cutting insulation film and weatherstripping.
- Measuring Tape: To measure window dimensions accurately.
- Scissors: For trimming materials like insulation film and thermal liners.
- Hair Dryer: To shrink insulation film to fit windows perfectly.
- Screwdriver: For fastening hardware if needed.
- Caulk Gun: To apply caulk around windows.
- Insulation Film: Reduces drafts by covering windows.
- Weatherstripping: Seals gaps around windows to prevent air leaks.
- Draft Snakes: Blocks cold air from entering through window bottoms.
- Insulating Curtains: Adds a thermal barrier to reduce heat loss.
- Thermal Liners: Enhances the effectiveness of insulating curtains.
- Caulk: Seals gaps and cracks around windows.
Having these tools and materials ensures a smoother DIY insulation process.
Maintenance and Troubleshooting
Proper maintenance improves window insulation effectiveness.
Regular Checks and Maintenance Tips
- Inspect Seals: Check weatherstripping quarterly for wear. Replace if brittle.
- Clean Windows: Remove dirt and debris monthly to ensure seals work properly.
- Check Insulation Film: Inspect the film annually for tears. Reapply if damaged.
- Caulking: Examine caulk around windows biannually. Reapply if cracked or peeling.
- Drafts: If you feel drafts, reseal weatherstripping or reapply insulation film.
- Condensation: Condensation between panes indicates a seal failure. Replace the window if this occurs.
- Loose Insulation Film: If the film becomes loose, shrink it with a hair dryer.
- Sticking Windows: Lubricate the tracks with silicone spray if windows stick. Check for debris.
Conclusion
By taking the time to insulate your windows yourself you’ll not only boost your home’s energy efficiency but also enhance your comfort. With simple tools and materials you can tackle drafts and reduce energy bills. Remember to maintain your insulation efforts by inspecting and cleaning regularly. Troubleshooting common issues ensures your windows stay in top shape. So roll up your sleeves and get started on creating a cozier and more energy-efficient home!


